juha.net#aviation #dev #photography #tech
Small Gaming PC Build
I had two goals for this PC build: Get enough performance for son’s Minecraft and other 3D Steam games, and secondly, build a really small PC. Minimizing is a kind of trend, but it was also a bit of necessity for me, as I did not want to have a monstrous PC taking lots of floor space.
Concept and Case
First task was to decide the case and motherboard size. As I wanted small PC, I did some study on Mini-ITX vs ATX. This discussion in tomshardware.com was very helpful, and I decided to proceed with Mini-ITX. However, I was bit worried on power supply, as Mini-ITX power supplies are smaller, but also more expensive and not that powerful as full size ATX supplies. That is why I decided to get Mini-ITX case that has space for the full size ATX PSU (power supply unit)
 After research, I went and ordered CoolerMaster Elite 110, as it was touted to be one of the smallest and best case for my purpose. However, after I received it, I was disappointed. Yes it was small but the cubic form made it feel bigger than expected by the spec.
Since the case was cheap, I decided to have a second try. Googling resulted hit on a page where a guy had modded the Mini-ITX PSU case for ATX PSU in overclock.net. The build was based on Silverstone SG05, which is meant for Mini-ITX PSU and is a really small one. I wanted do the same, so I ordered Silverstone SG05 Lite. I did once HTPC on Silverstone case and liked that, too.
Motherboard and processor
Next was to get “MoBo” and the processors. Since I somehow trust ASUS brand when talking about computers, I ordered Asus Z97I-PLUS Intel Z97 LGA 1150. It should support Broadwell processors (should, nobody seems to know for sure).
For CPU, I got Intel Core i5 4690K 3,5 GHz LGA1150 — latest from Haswell line-up. Should be easy to overclock and run cool. Much cheaper than i7s, and I believe for gaming this should be efficient enough.
Display card
The display card is naturaly one of the hardest things to decide, since that is the heart of the any gaming PC. Small case means troubles, as fast cards are big and producing lots of heat (besides being expensive).
Luckily, there was a new generation of cards coming up as NVIDIA had refresed their Maxwell architecture. And, amazinly, Gigabyte had just introduced cool, small card, GIGABYTE GV-N970IXOC-4GD GeForce GTX 970 4GB. Although being a little expensive for my budget, I just had to get the card, as it was so good match to my setup.
The build
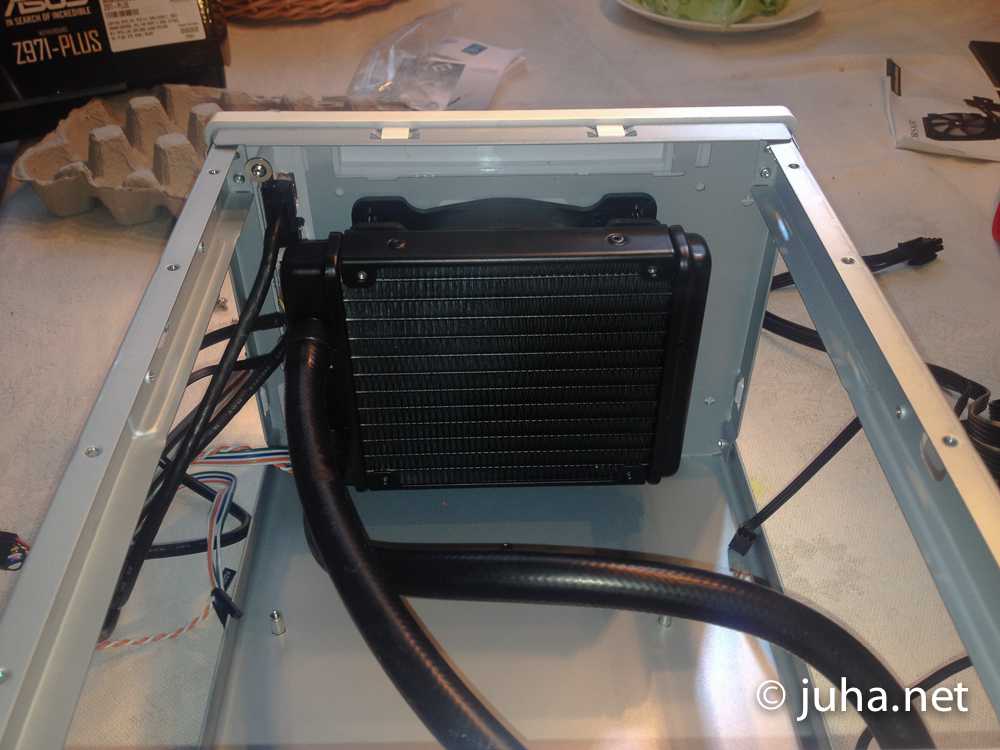 First mission is to install CPU cooling. For this box, we need liquid cooling since there will be no room on top of CPU for any fan based solution.
Cooler system 12” fan and radiator installs nicely behind the front panel, which is the place for main case fan.
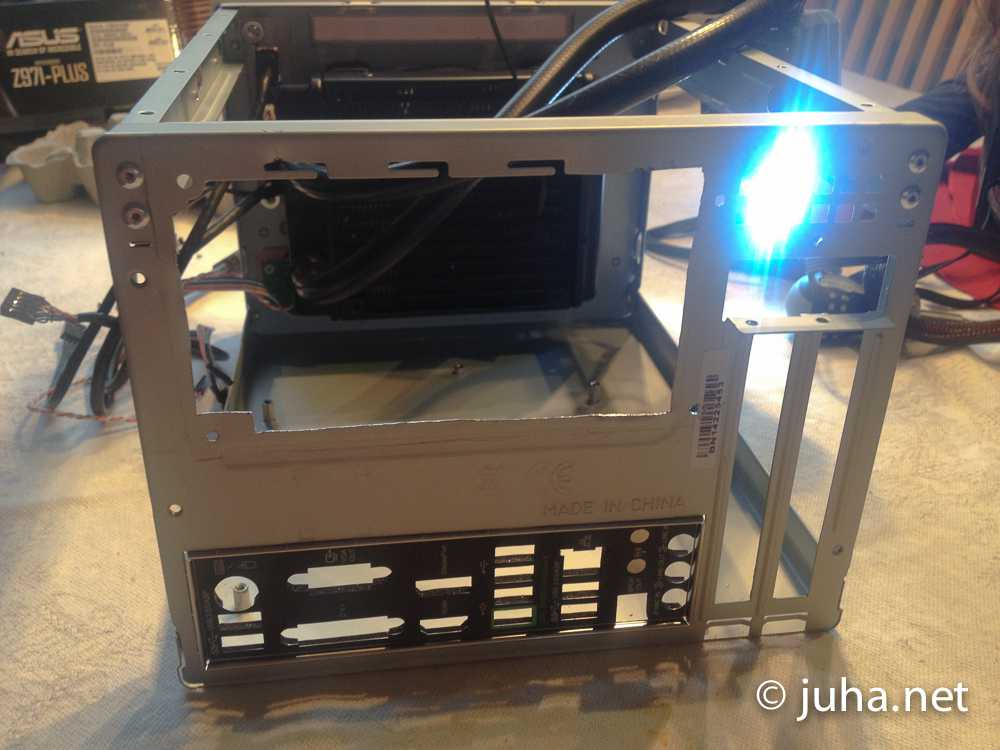 Since the case was not designed for full size PSU, the back plate hole had to be widened to make sure air flows freely from the larger PSU.
With power drill it was easy to make new screw holes for the PSU.
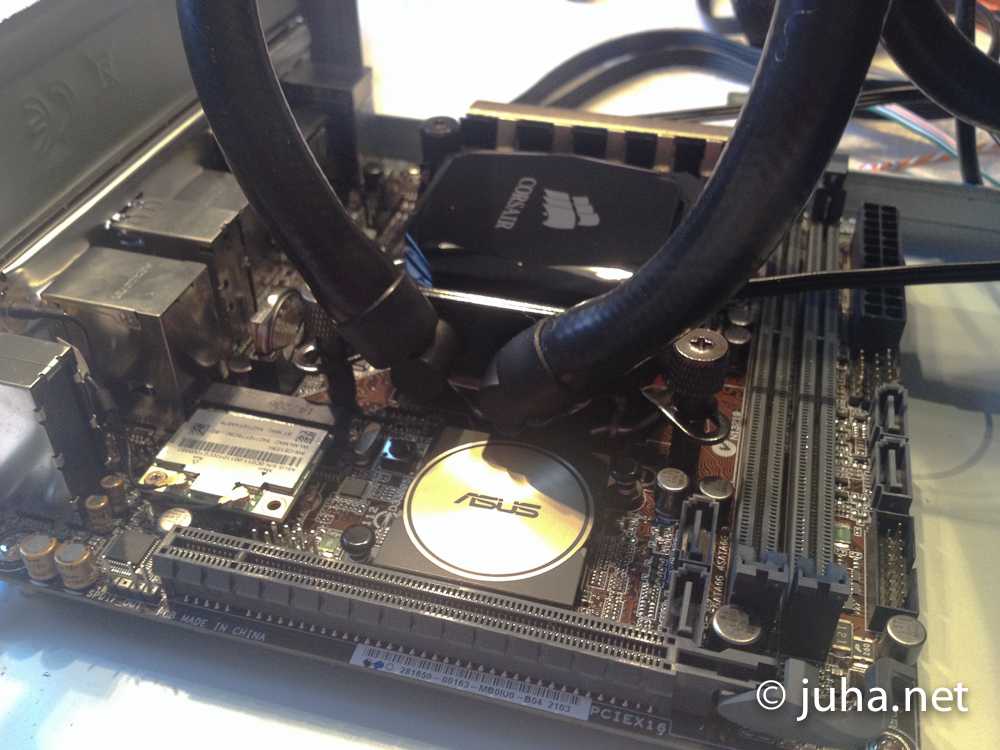 The main board installs nicely for it’s place. CPU clicks in nicely into the socket.
Installing the cooling unit is also walking in the park, as the pad was readily prepared with the cooling paste, and the unit was secured into place with hand screws, handy!
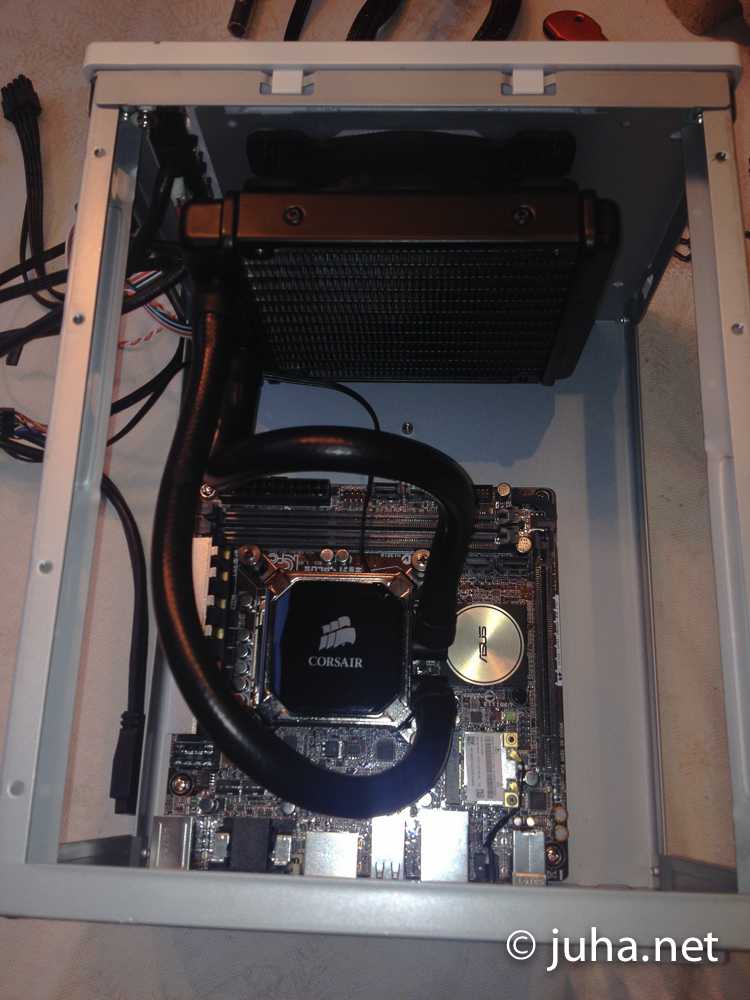 View after installing the main board, CPU and CPU cooling system. It took some planning to make sure the cooling system tubes had the right routing. Those tubes are quite stiff and does not bend easily, obviously to make sure the cooling fluid flows nicely.
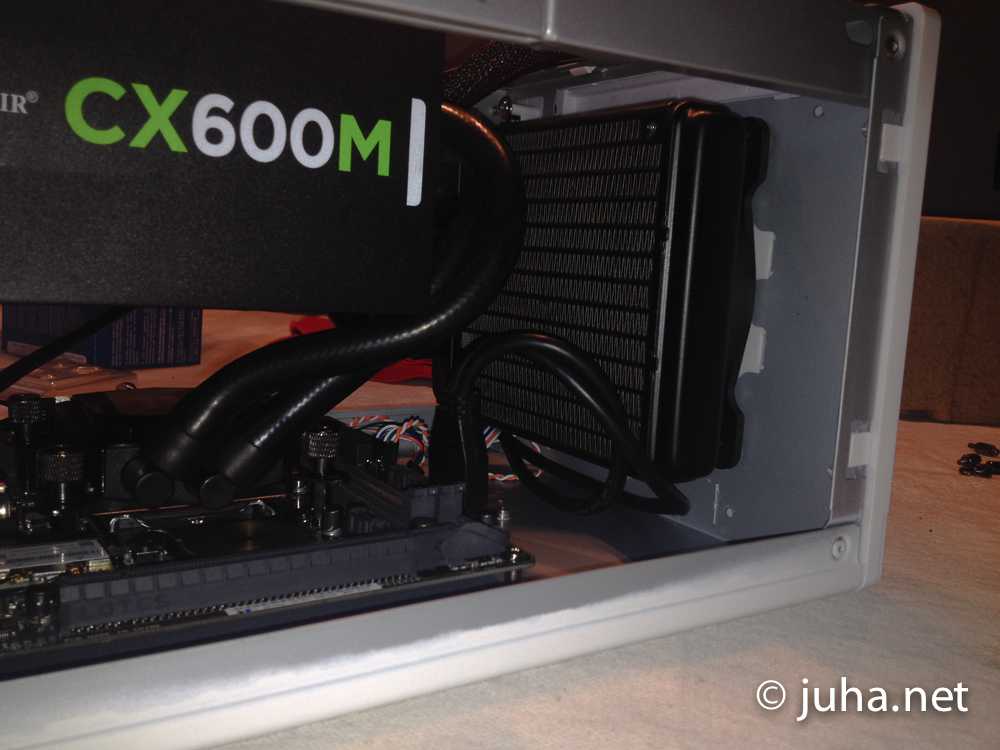 Time for the power unit. In this stage, I was thinking it was mistake to put that huge unit inside the small box. Luckily, there was enough space between the PSU and main board.
Since the PSU sucks air from bottom, it actually cools the main board.
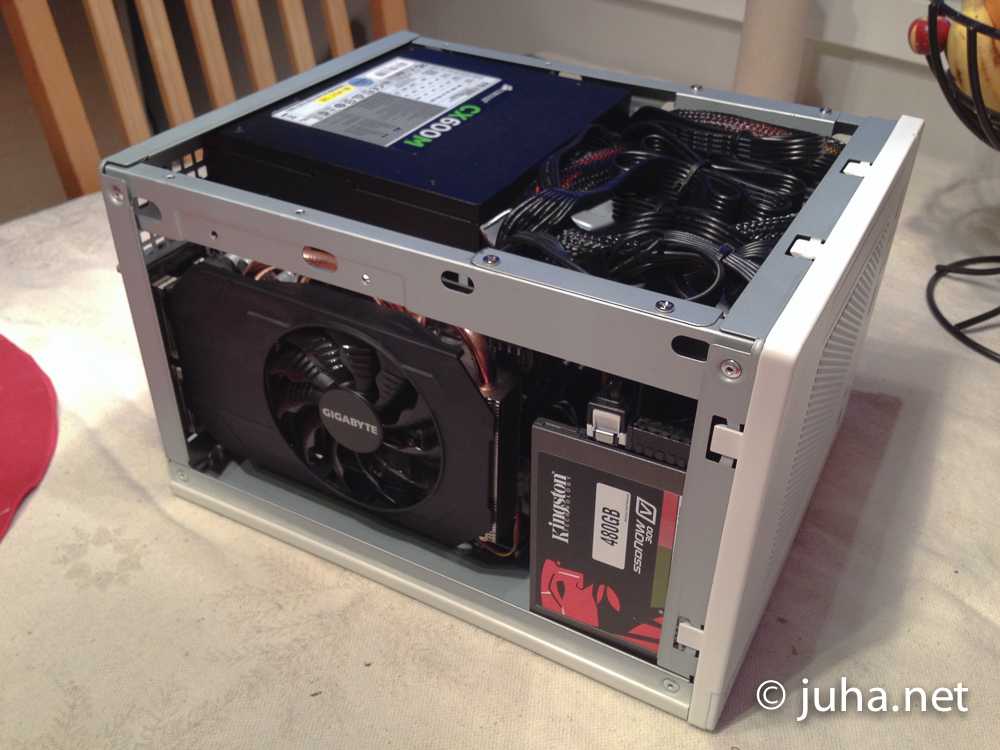
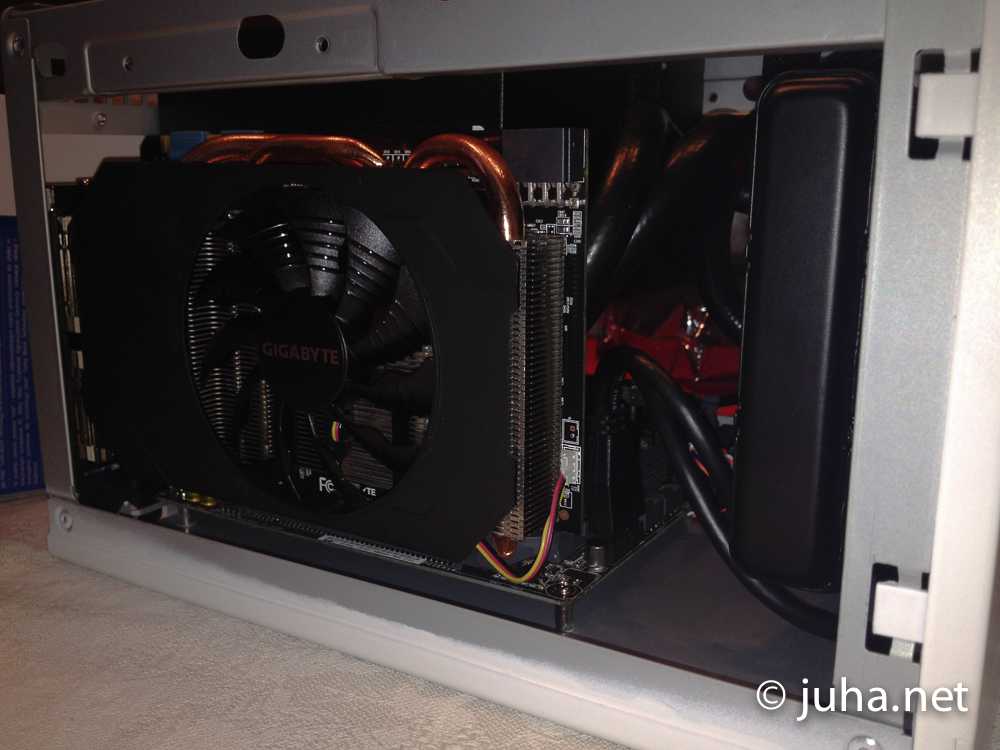 Believe or not, there is enough space for the graphics card (this is same side as in image above).
There is like 3mm space between the back of the card the the PSU. Card is blowing hot air from both ends. In the front end, the hot air mixes the air coming from the case front (CPU) fan. This can be problem, if the PSU fan does not run fast enough.
 View from another side, after routing few cables from the front panel to the main board. Some cables were unfortunately bit short and could not be routed nicely. However there is still proper room for air flow.
Installed also memory chips.
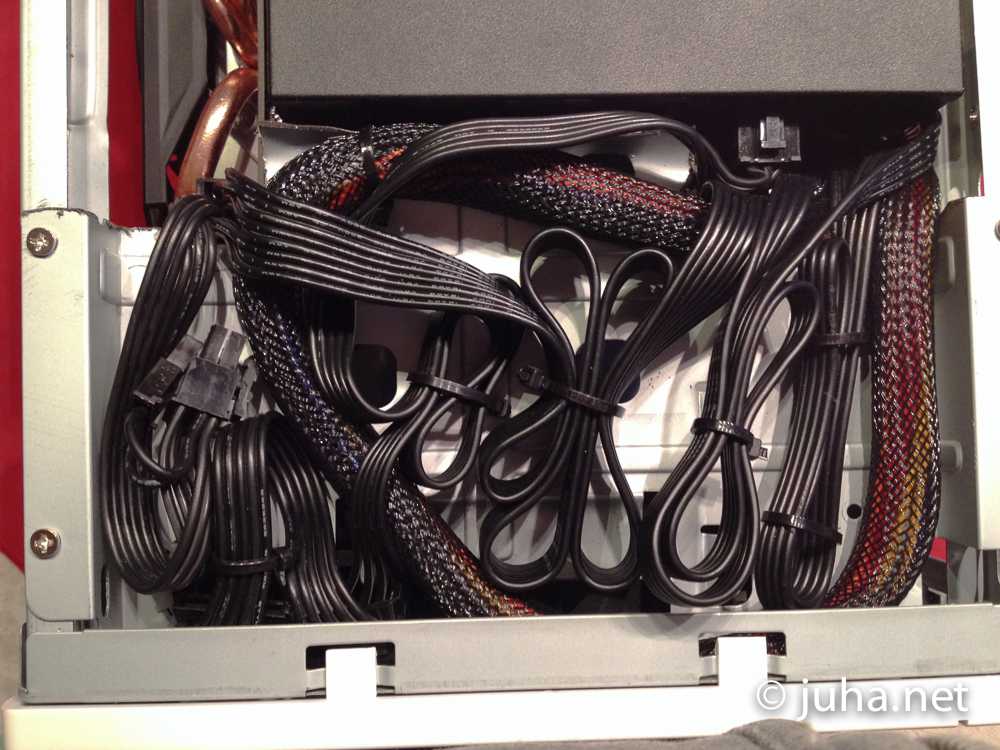 The case had a bay for the CD drive above the front fan. Instead of installing CD drive (also because there was not enough space for it due to XXL PSU), I used the space for storing the wires, mainly power cables coming from the PSU. Since the PSU is modular, I should buy shorter cables. However, these cables are totally isolated from the air flows.
As the last step, the hard drive was installed. Unfortunately there is no room for standard 3.5” drive (until I reduce cables from the upper department), so this PC has only half terabyte SSD drive, installed inte front corner as seen in the picture.
 Fire it up! After checking from the BIOS that the CPU tempareture was holding nicely around 41 Celcius, it was time to install the OS.
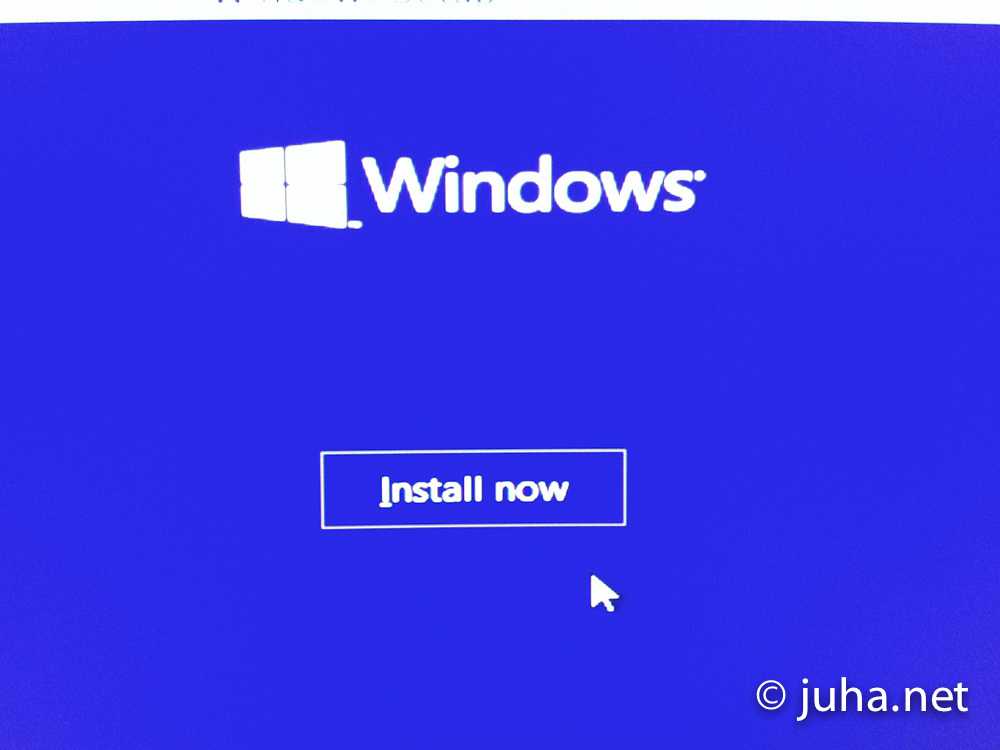
For this build, I chose Windows 10 technical preview.
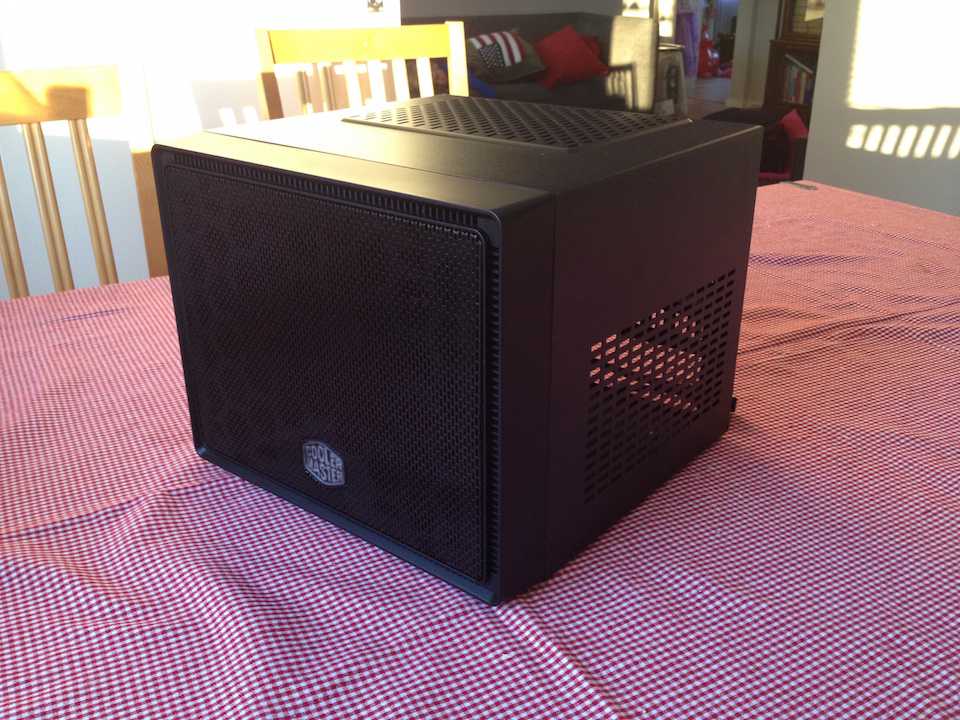
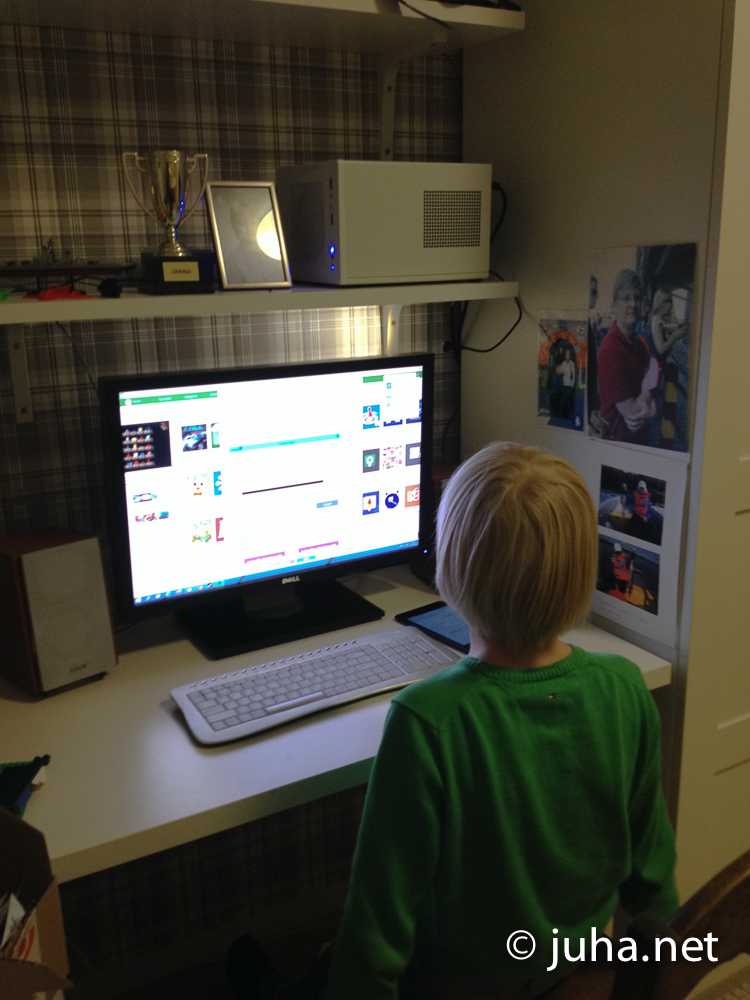 Ready! Small and ready for action!
The noise level is tolarable. If this would be running in livingroom, maybe too loud for late night movies. For normal PC use, the noise levels are good, even in high load.
Remarks
The PC has been running now (end of September 2015) for over half a year without much trouble. However, most of the time it runs moderately heavy games, but even for longer heavy load tests did not produce any halts. One problem was found; the internal wifi card went dead during the summer. I have had no time yet to study the problem in detail.